Aladdin-light-lift ALL300-CM-240V Manuel d'utilisateur Page 1
Naviguer en ligne ou télécharger Manuel d'utilisateur pour Éclairage Aladdin-light-lift ALL300-CM-240V. Aladdin Light Lift ALL300-CM-240V User Manual Manuel d'utilisatio
- Page / 13
- Table des matières
- DEPANNAGE
- MARQUE LIVRES
Noté. / 5. Basé sur avis des utilisateurs
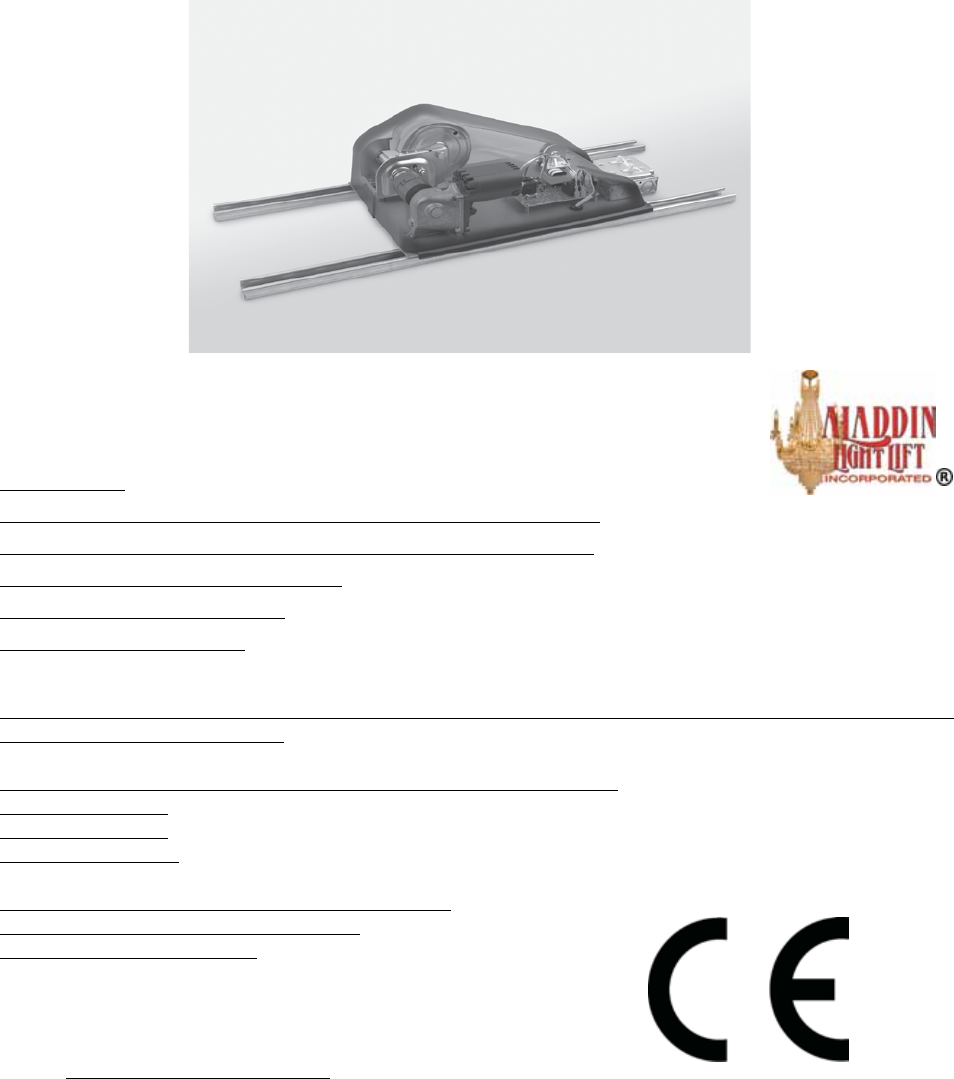
ALL300-230V
INSTALLATION
INSTRUCTIONS
Aladdin Light Lift, Inc. (256) 429-9700
61 Shields Road (877) 287-4601
Huntsville. AL 35811 www.aladdinlightlift.com
Patent #5105349
WARNING: Disconnect power source before servicing to avoid electrical shock
CAUTION: To Reduce the Risk of Electric Shock or Injury, Use Indoors Only.
Light and motor circuits are rated at AC 230V
Pour usage seulement dans un endroit
Avec acces au dessus du plafonds
Model Number: ALL300 (136.4 Kg rated working load, 1/8” steel galvanized lay cable, 1.5amp,50/60Hz)
__ Greeneld _(if checked)
Light lift is equipped with a 35’ (10.6m) cable unless checked below:
______65’ (19.8m)
______90’ (27.4m)
______120’ (36.6m)
Light lift is equipped with a 1,650 watt (15 amps)
lighting capacity unless checked below:
______2200 watts (20 amps)
________________________
Manufacture Date © 2012 All Rights Reserved
Résumé du contenu
Page 1 - INSTRUCTIONS
ALL300-230V INSTALLATION INSTRUCTIONSAladdin Light Lift, Inc. (256) 429-970061 Shields Road (877) 287-4601Huntsville. AL 35811 www.alad
Page 2 - ALL300 Parts Bag List
STEP 23Adjust screw collar rings so top of canopy is just below edge of bottom contact plate. Canopy should be at least 4.4cm deep. See Diagram I.Nev
Page 3
STEP 27Tighten xture coupler set screws using supplied 3/32” Allen wrench. Fixture coupler set screws have thread lock already applied at factory. S
Page 4
ALL300 TROUBLESHOOTING GUIDETECH SUPPORT: (877) 287-4601 Monday through Friday 8:00am to 4:00pm US CSTI. Troubleshooting and installation must be per
Page 5 - Sheetrock
ALL300 TROUBLESHOOTING GUIDE cont. 1. Conrm ALL300 is at the CEILING POSITION. If not, use the controller to operate the ALL300 to the CEILING POSI
Page 6
Read the following guidelines prior to installing the ALL300:I. e ALL300 must be installed by a licensed, bonded and insured electrician. II. e ALL
Page 7
STEP 1Determine where ALL300 will mount on ceiling joists. ALL300 must be installed level, in an accessible location directly above chandelier.Never
Page 8
STEP 5Attach the 1/2” conduit connector on ceiling box to bottom of conduit assembly. Once completely inserted, tighten set screw on conduit connecto
Page 9
STEP 7Position ALL300 where ceiling box will be centered in ceiling hole. Weight and bottom contact plate assembly should hang down through ceiling h
Page 10
STEP 9Shim and adjust ALL300 so that winch cable hangs plumb through center of hole in top contact plate on ceiling box. See Diagram E. Look up at c
Page 11
STEP 11Turn o supply power before wiring ALL300. Turn o motor switch in square box. Wire motor switch with 230V wiring. e 230V motor feed must be
Page 12 - ALL300 TROUBLESHOOTING GUIDE
STEP 13Remove dust cover by using 5/16” nutdriver or socket. Remove paper tape from winch drum while keeping tension on winch cable.Never operate the
Page 13 - Warranty Agreement
STEP 20Fully thread screw collar loop or threaded stem that was supplied with chandelier to 1/4 IPS(13mm) xture coupler. If chandelier was supplied
Produits connexes et manuels pour Éclairage Aladdin-light-lift ALL300-CM-240V
 (13 pages)
© 2020, manymanuals.fr. Tous droits réservés | 2.910 s |
 Manymanuals.com
 Manymanuals.de
 Manymanuals.fr
 Manymanuals.it
 Manymanuals.pl
 Manymanuals.cz
 Manymanuals.es
 Manymanuals-pt.com
Commentaires sur ces manuels